Getting Started
This is the zero-to-working-chart path. It takes about five minutes.
New to TaskNotes?
TaskNotes Gantt is a companion to TaskNotes, a
task-and-note plugin for Obsidian. TaskNotes is the system of record: it
owns what a task is, its scheduled / due dates, its blockedBy
dependencies, and its statuses — the Gantt just draws and edits them.
If those terms are new, skim the TaskNotes Core Concepts and Task Management pages first. You can still use the Gantt as a read-only timeline without TaskNotes — see Core Concepts → The two modes.
Requirements
- Obsidian 1.10.0+ (the Gantt is built on the official Bases API).
- The core Bases plugin enabled (Settings → Core plugins → Bases).
- TaskNotes — this plugin is built as a TaskNotes companion, so TaskNotes is strongly recommended: it's required for write-back, dependencies, colors, inline editing, and task menus. Without it you get only a read-only timeline (see the two modes).
1. Install the plugin
Until the plugin is in the community store, install it one of two ways.
- Install the BRAT plugin.
- In BRAT, Add a beta plugin and enter
renatomen/tasknotes-gantt. - Enable TaskNotes Gantt in Settings → Community plugins.
BRAT keeps you on the latest beta release automatically.
- Download
main.js,manifest.json, andstyles.cssfrom a release. - Put them in
<vault>/.obsidian/plugins/tasknotes-gantt/. - Enable TaskNotes Gantt in Settings → Community plugins.
Verifying the download (optional)
Release assets are built in GitHub Actions and carry a
build-provenance attestation.
You can verify a downloaded main.js was built from this repo's source:
2. Enable Bases
The Gantt is an Obsidian Bases view, so the core Bases plugin must be on: Settings → Core plugins → Bases.
3. Create a Base over your tasks
Create or open a Base whose query returns the notes you want on the timeline. With TaskNotes, that's typically your task notes. Without TaskNotes, it's any notes that have date properties.
4. Add a TaskNotes Gantt view
You can add the Gantt two ways — pick whichever fits how you work.
A · A standalone Base view. In the Base, add a new view and choose type TaskNotes Gantt. It fills its own tab — the natural home for a project's main timeline.
B · Embedded in a note. Drop a base code block into any markdown note and
give it an obsidianGantt view. The chart renders inline, right in the note:
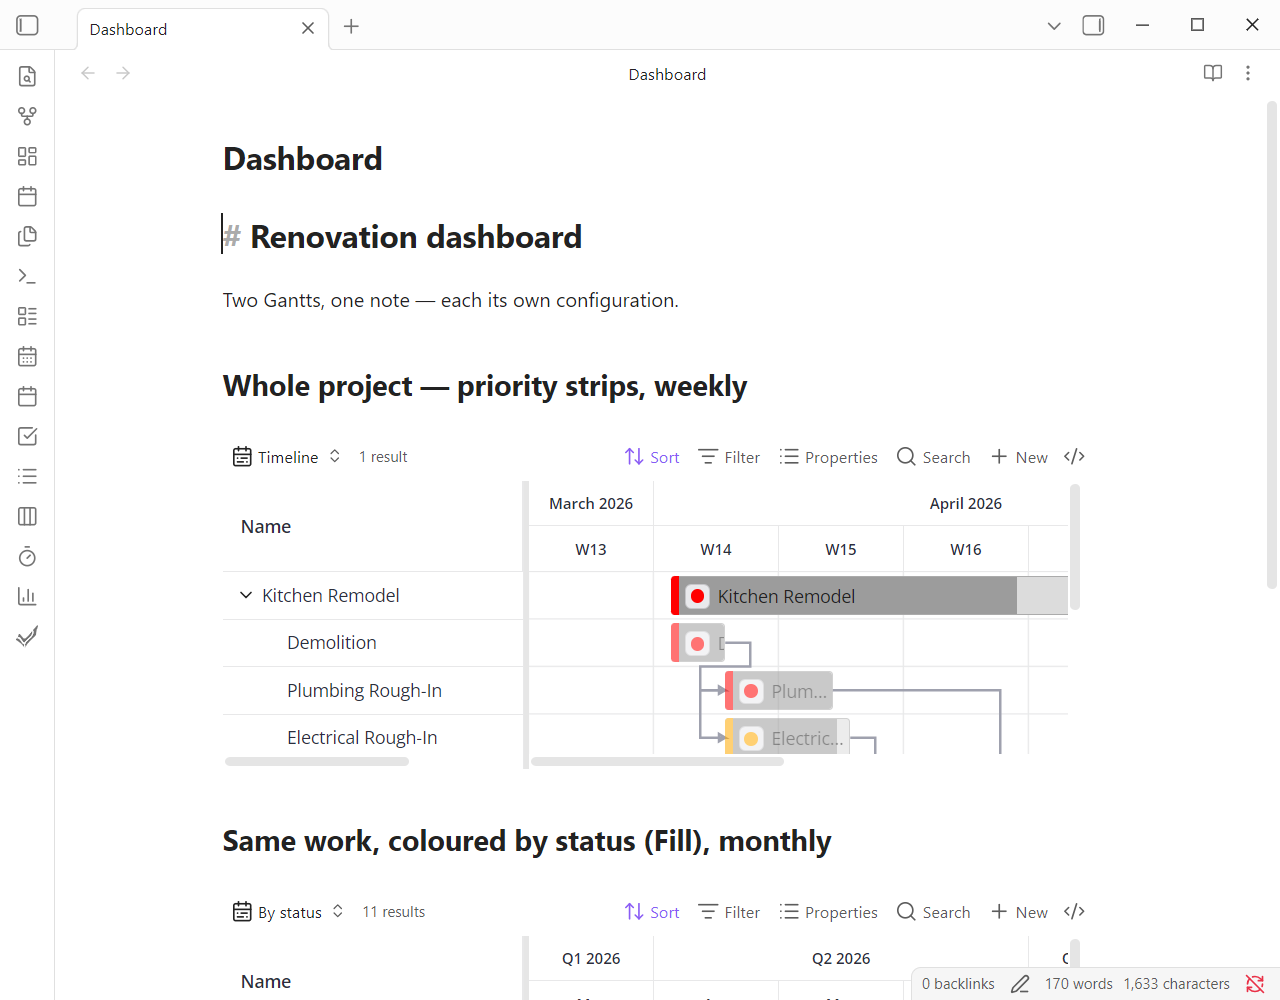
You can place several such blocks in one note, each with its own filter, scale, and colours — for example a weekly, priority-coloured view above a monthly, status-coloured view of the same project:
| Light | Dark |
|---|---|
 |
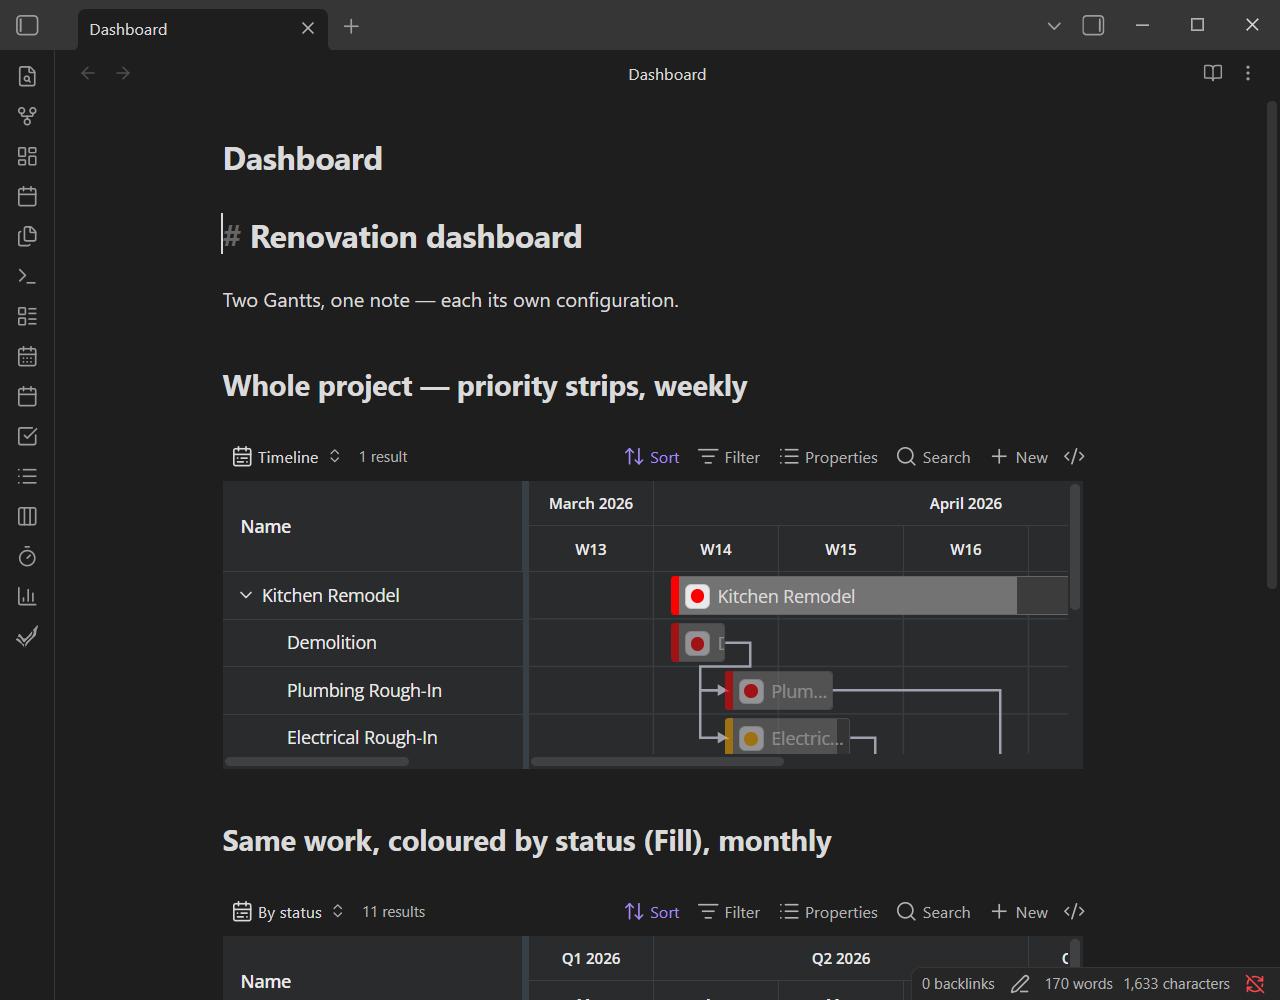 |
Either way, an empty (or partially populated) chart appears — the next step maps your dates.
5. Map your date properties
Open the view options (the gear / view-settings menu) and confirm the field mappings under Fields:
- Start Date Property and End Date Property — with TaskNotes these
default to
scheduled/due. Without TaskNotes, point them at whatever date properties your notes use. - Parent Property (optional) — enables parent/child roll-up.
Every field mapping is documented in Settings → Fields.
6. You should now see a chart
Your notes render as bars along the timeline. From here:
- Companion mode: drag and resize bars, draw dependencies, edit cells inline, and right-click a bar for TaskNotes' own task menu.
- Standalone mode: you have a read-only timeline — pan, zoom, and read.
Next steps
- Core Concepts — the mental model behind the settings.
- Features — what each capability does, with images.
- Settings & View Options — the complete reference.
- Stuck? Troubleshooting.